11 Hidden Gems of Windows 11
In our experience, most people drastically underestimate how many cool things their computer can do. This is especially true if your operating system is Windows 11. Windows 11 is packed with interesting and useful features, from the super convenient to the uber efficient.
Today, we’re picking some of the best ones you can start using right away. We’ve broken these down into three categories: performance-boosting, security, and accessibility features.
Without further ado, here are 11 hidden gems of Windows 11…
Performance-Boosting Features
1. Concentrate Easier with Focus Sessions
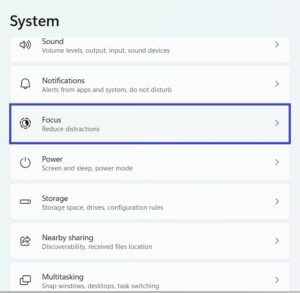
From emails and software updates to the constant pinging of collaboration software, staying focused can feel impossible. Focus Sessions silence digital distractions so you can stay focused on your work.
To start a Focus Session, go to System > Settings > Focus. From there you can set up a timer for up to 240 minutes and hit Start.
2. Enable Clipboard History
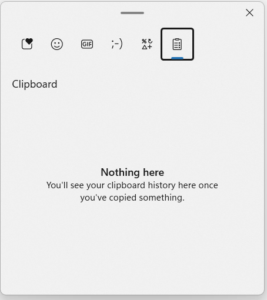
If you frequently copy and paste, Clipboard History is a game changer. This feature keeps a record of everything you’ve copied so you don’t have to keep switching between files to grab what you need. Simply open Clipboard History and take your pick.
To activate Clipboard History, simply press Windows Key + V, and then, click Turn on. Now Windows will start recording everything you copy, including text, images, and links – so you can access them with ease instead of having to toggle between windows and continually recopy items.
3. Move ‘End Task’ to Your Taskbar
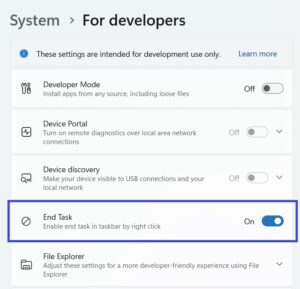
When an application freezes, using End Task is a great way to force it to close. The problem? This option is buried inside your Task Manager. Let’s change that:
- Go to Settings > System > For Developers
- Turn on End Task.
Now, when you right-click any icon in your taskbar, the ‘End Task’ option will appear second from the bottom, making it easy to close any unresponsive application without having to dig around in your Task Manager.
4. Create More Workspaces with Multiple Desktops
Constantly switching between applications and documents is tedious and time-consuming. The Multiple Desktop feature lets you organize your apps into separate spaces (called desktops). For example, you can keep communication apps on one desktop, projects on another, and separate personal and work tasks. This is especially useful for those without multiple monitors or displays.
To add a new desktop, select the Task view icon to the right of your search bar (the white and gray square), then select New Desktop. You can quickly toggle between your desktops by tapping Win + Ctrl + Left/Right Arrow.
Ta-dah! You now have multiple desktops for easy organization. You can even set each desktop’s wallpaper for further customization.
5. Save Energy with Power Savings Options
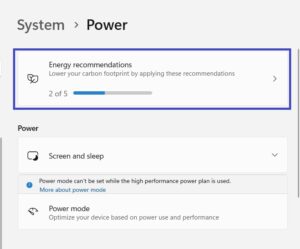
Windows 11 provides simple power-savings features that reduces energy usage while idle – because why pay for power you’re not using?
To start saving right now, go to:
Settings > System > Power & battery > Energy recommendations.
And just like that, you’ve saved yourself some cash.
Security Features
6. Improve Your Security with Dynamic Lock
Ever walk away from your computer only to realize you forgot to lock it? Dynamic Lock has you covered. This feature uses proximity technology combined with Bluetooth (such as your phone) to automatically lock your PC when you step away.
Enable Dynamic Lock by following these steps:
- Open settings > Bluetooth & devices > Add device.
- Select your Bluetooth device from the list and connect.
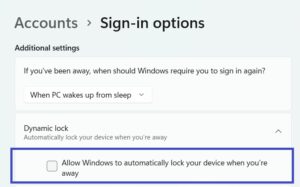
- Go to Accounts on the left menu > Sign-in Options.
- Under Additional Settings, select Dynamic lock.
- Check Allow Windows to automatically lock the device when you’re away.
Once set up, take a few steps away from your computer with your paired Bluetooth device. If your computer locks itself within 30 seconds, you’re good to go.
7. Protect Yourself with a Random Hardware Address
This one is a bit techier, but it can significantly boost your privacy, especially on public Wi-Fi networks. By masking your real Wi-Fi address with a random hardware address, Windows 11 makes it much harder for others to track your device’s location and internet usage.
To enable this feature:
- Open Settings > Network & Internet > Wi-Fi.
- Turn on Random Hardware Addresses.
And that’s it! Your device’s true Wi-Fi address now has extra protection from potential trackers.
Note: If you don’t see this option, it might mean your network adapter doesn’t support this feature.
8. Adjust Your Privacy Settings
More companies than ever are tracking your online activity. While this data is typically used for targeted ads, the more information you have out there, the greater the risk of it being exposed in a data breach – and that’s a problem.
To take control of your data privacy, you can adjust your privacy settings by:
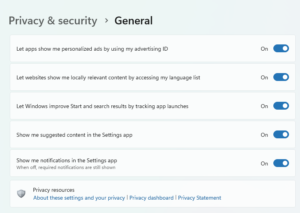
- Go to Settings > Privacy & Security > General. Here, you’ll find several options you can toggle to disable data collection for things like personalized ads.
- Next, go back to Privacy & Security and then Diagnostics & Feedback. This section controls how Microsoft uses your data to provide personalized tips and recommendations. You can turn these features off to limit data collection.
While these settings don’t provide 100% privacy, they offer some control over how your personal data is used.
Accessibility Features
9. Change the Color of Your Mouse Pointer
If you’ve struggled to find your mouse pointer against a busy background, you’ll be happy to know that you can change its color for better visibility. Here’s how:
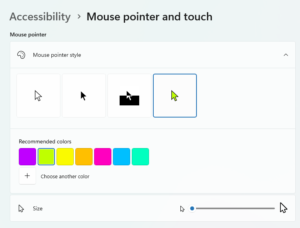
- Open Settings > Accessibility > Mouse > Mouse pointer
- Under the Mouse Pointer section, select the color option (green is the default).
- Once selected, additional color options will appear. You can even create custom colors by clicking the “+” next to Choose another color.
10. Try Out Live Captions
This feature provides real-time captions for almost any audio content, making it easier to follow along with videos, podcasts, or conversations. To activate this feature:
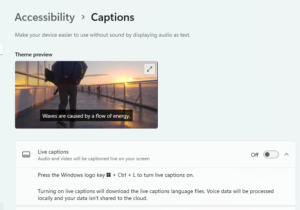
- Open Settings > Accessibility > Captions > Live Captions
- Select ‘Yes, continue’ at the top of the screen and wait for Live Captions to finish setup.
Once enabled, captions will automatically appear at the bottom of your screen whenever there’s audio content.
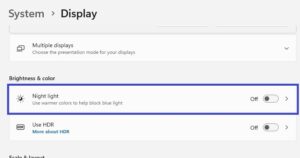
11. Improve Your Sleep with Night Light
Your display emits blue light, which mimics daylight and can strain your eyes – especially if you’re working late into the evening. Even worse, this blue light can disrupt your sleep schedule. If you’re up late, try turning on the Night Light feature. It makes your screen’s colors warmer, reducing eye strain and helping you sleep better.
To activate Night Light:
- Click the Network icon next to your clock on the taskbar and select Night Light.
- Alternatively, you can go to Settings > System > Display and toggle on Night Light there.
Your eyes – and your sleep schedule – will thank you.
Bonus Feature
Move Your Start Button
If you’re old school, you might miss having your Start button in the bottom left corner of your taskbar (instead of centered). Luckily, it’s easy to change. Here’s how:
- Go to Settings > Personalization >Taskbar
- Under Taskbar Behavior, click the drop-down menu for Taskbar Alignment and select Left.
And just like that, your Start button will be back in its classic position!
But Wait, There’s More…
If you’re after more easy-to-follow guides and straight-to-the-point tech explanations, you’re in the right place. Whether it’s troubleshooting Wi-Fi issues or breaking down the best Microsoft 365 Apps, we’ve got you covered over on our main blog page.
And while you’re there, why not suggest a topic? We’re always looking to cover what matters most to our readers. Let’s hear your ideas!
